What you'll need:
Ceramic tiles (Lowes, Home Depot)
Mod Podge
Foam brush
Tissue paper-white (actual tissues, napkins or gift wrapping tissue paper)
Foam or Cork adhesive pads for bottom of coasters
 | ||||
First, you will want to decide what images/pictures/words you will want placed on your coasters. For our present we picked a picture of Everett and a funny quote about having grandchildren. I saved this into a word document. When you are ready to print your images, tape your tissue (all I had was actual tissues, the square ones) to your printer paper. Make sure the tissue is not going over the edges of the paper as it may jam the printer. Also, remember that word documents usually have about an inch margin on each side of your paper so keep that in mind when printing your image/s. Now, place the paper--with tissue taped on (one ply is best)--in the printer and make sure that the way it feeds through will be on the tissue side. When you are done printing you will have something like this:
Now cut out your images so they fit onto your tiles. I cut mine a bit smaller. In the end product, you cannot even see the white anymore, so if you cute too small, or a little uneven it is ok. Also, it is much easier to cut the tissue while it is still taped to the paper. Once cut, peel down to one layer.
Now using the foam brush and mod podge, brush a thin layer onto the ceramic tile and place your image on.
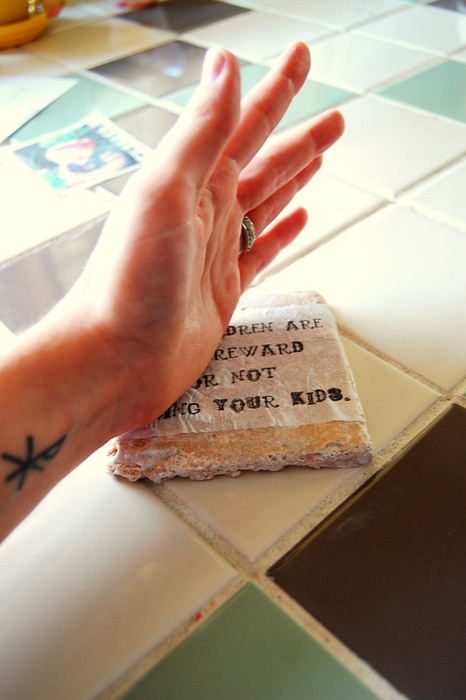
Gently...pat down your image so it adheres to the coaster. I usually do this step with the side of my hand because it is flat and covers a large part. If I do it with my fingers, it can get stuck and rip the tissue.
Now place another coat of mod podge over the tissue. Its best if you really coat it on so it does not rip the image. Its ok if it looks really white and blurs out your image--it will dry clear!
Let that dry for about 30 minutes and then put another coat on and let it dry overnight.
When they are all dry place, your protective pads on the bottom of each tile.
Grandpa loved his gift! :)
You can do this with virtually any decorative napkin design you like as well--just cut it to size and follow the same steps. Or you can go this more personal route and use your own pictures, photography or artwork.
Have fun!


that is so creative! How in the world did you think to run the tissue paper through the printer (using another sheet of paper)?! :) Very cute little gift :)
ReplyDeleteIs the mod podge like a sealant so the tiles won't stain from cups?!
ReplyDeleteYes! Sealant and adhesive!
ReplyDeleteI'm pretty sure that you father will really appreciate the personalized coaster that you made for him because you give time and effort to make this gift. I also love the quotes that you put on the coaster. Great job!
ReplyDelete