Here's what you need:
Fabric
Ribbon
Sewing machine
Rice
Scent (dry) of your choice (ex. mint, peppermint, lavender, jasmine, etc)
**Please pardon my pictures, they were taken in my sewing area in the basement and are a bit dull (if you look closely though you can sneak a peek of my new revamped area!)**
You can make these really as large as you desire, it is the same process, just more fabric and sewing if you go bigger. For this I cut two identical pieces of fabric (about 5 X 9) and one chunk of ribbon about 6 inches long. I plan for about an inch extra on each side of my fabric. Also, the ribbon, if you are wondering is something I found useful when the pack is hot--I sew it in and use it as a little loop handle so I am not playing hot potato with my eye pillow. (btw--eye pillow and hot pack are the same in my mind)
Any kind of rice will do--the cheaper the better!
For this project, I was fresh out of lavender, so I opted for mint.
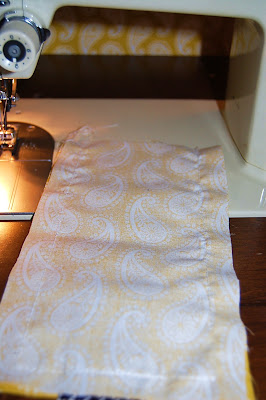
Begin by placing the two pieces of fabric 'right sides' together. If you desire you can draw light lines of where you would like to sew. I did this so you could hopefully get a better idea. Begin to sew down one of the long edges first. ( you will be leaving one of the short edges open to put the rice and scents into).
When you get to your first short edge, lift up one of the pieces and place you ribbon in as shown--so the folded edge is facing inside the fabric and the edges are flush with the edges of your fabric. once you have placed it in the middle, place the fabric back on top and sew your line (I usually sew over the ribbon part back and forth about 3 times).
Only a few steps left! I am finished sewing my 'U' shape--leaving the top open.
Now, cut the excess fabric from the sewn sides down to about 1/8 inch.
For a little added security, I like to do a zig zag stitch along the side.
Turn it right side out now and make sure you poke out the corners and sides as much as you can. And because I am OCD I like to iron it at this point. Who doesn't like crisp pressed fabric! (ugly ironing board, right?)
Alternate filling the pack with rice and then mint (or whatever you choose) until it is mostly full. I ended up using about 2 cups of rice and 4 tablespoons of mint.
Once it is filled (leave about 3 inches unfilled), turn in the edges of your open side like so. Turn them in at least 1/2 inch.
Sew that sucker down 2 or 3 times!
Done! And it only took about 15 minutes!

Silly boys!
Put it in the freezer to your desired temp for a cooling effect or put it in the microwave about 1-2 minutes (if small) for a hot pack!
These make great gifts too!


okay, LOVE your fabric choices and it's nice compact size. so cute!
ReplyDeletethis is great! thanks so much for the tutorial! Your fabric is adorable as well. cute cute cute!
ReplyDelete:-) Great tutorial! Thank you!
ReplyDeletePerfect!
ReplyDeleteI have tried a couple different ways to do this and it never turns out. Thanks so much for the tutorial I will def try it out tomorrow!!
Thank you :)
thanks for the comment Meghan! :)
Delete